Why drive checks prevent DLL errors
- Fixes file-system metadata: repairs directory/NTFS index issues that lead to missing or unreadable DLLs.
- Recovers bad clusters: isolates failing sectors so Windows won’t read corrupt data into memory.
- Stabilizes apps: fewer I/O errors means fewer “file not found” and “Bad Image” errors at load time.
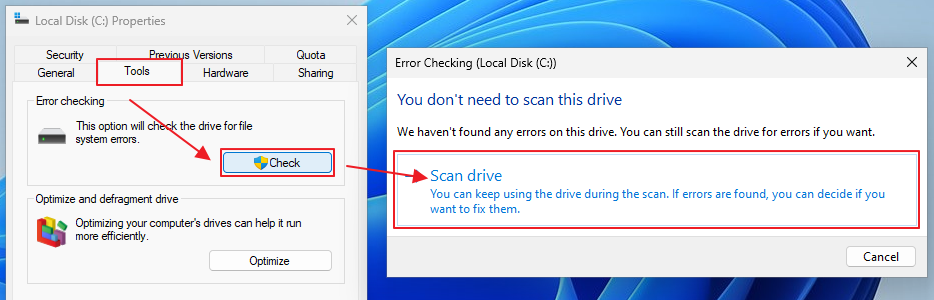
Open Error Checking
- Open File Explorer, right-click the drive (e.g.,
C:) → Properties. - Go to the Tools tab.
Start a scan (GUI)
Under Error checking, click Check, then follow the prompts.
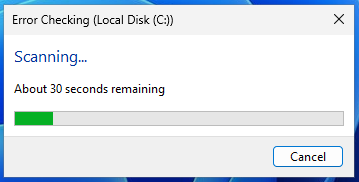
Let the scan complete
Scanning can take minutes on large drives—let it finish without interruption.
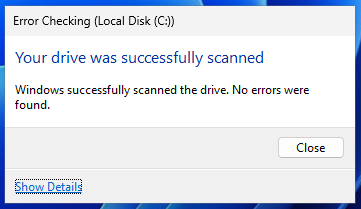
Apply fixes & restart if asked
When the scan completes, apply any recommended fixes. If prompted, restart to finish repairs.
If Windows schedules a reboot
System drives are often locked while Windows is running. Windows will schedule a boot-time check; restart to allow repairs before Windows loads.
Command-line (CHKDSK) options
Run from an elevated Command Prompt:
chkdsk C: /scan
To fix errors:
chkdsk C: /f
If the drive is in use, schedule at next restart. Check for bad sectors (long scan):
chkdsk C: /r