Why Disk Cleanup helps
- Frees space: low free space degrades performance and can cause update/app failures.
- Clears stale files: old temp/cache files can cause conflicts and “Bad Image” errors.
- Smoother updates: removing Windows Update leftovers reduces future installation issues.
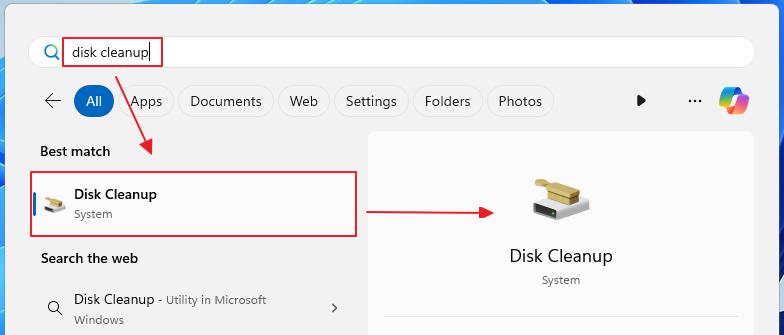
Open Disk Cleanup
- Open the Start menu and type Disk Cleanup, then launch it.
- Select the drive you want to clean (typically
C:).
Select items to clean
Tick the items you want to remove. Common, safe choices include:
- Temporary files and Thumbnails
- Recycle Bin
- Delivery Optimization Files
- DirectX Shader Cache
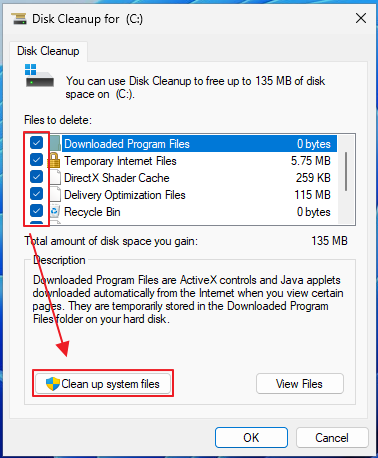
Clean system files
Click Clean up system files (requires elevation) to add deeper options like:
- Windows Update Cleanup
- Windows Upgrade Log Files and Temporary Windows Installation Files
- Previous Windows installation (
Windows.old) — only if you don’t plan to roll back
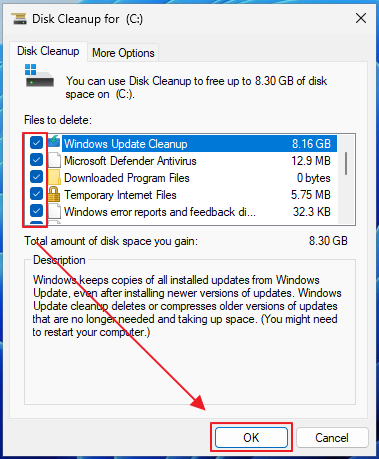
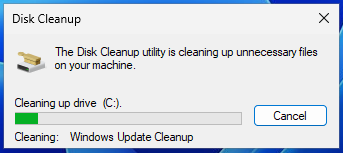
Run the cleanup
Click OK → Delete Files to start. Disk Cleanup will close when finished.